Bad tools make any job harder. I once used a dull screwdriver on a tight terminal—it kept slipping and nearly stripped the screw. What should’ve taken 2 minutes turned into a 20-minute struggle. In electrical work, the wrong tool doesn’t just waste time—it can lead to mistakes or even injuries.
But here’s the good news: the right gear makes everything easier. Even complex tasks become smoother, safer, and less stressful. If you’re just starting out, having these 10 essential tools can give you the confidence and safety you need to do the job right.
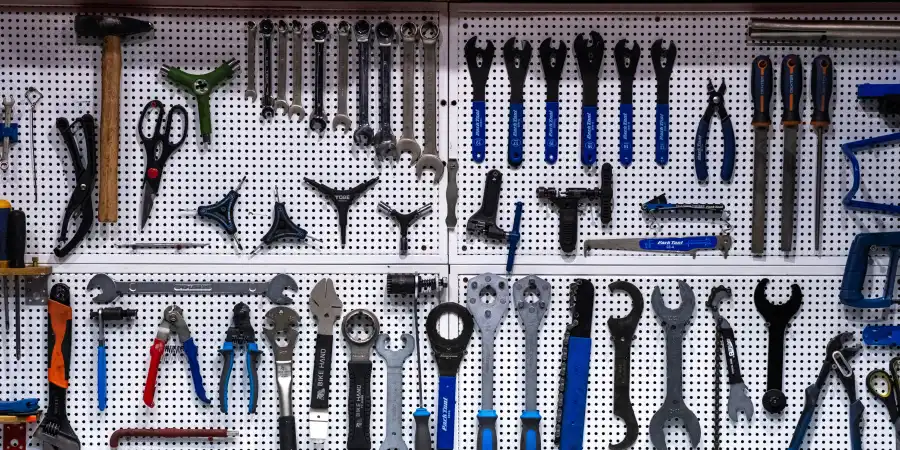
Good tools feel like an extension of your hands. When your multimeter gives a clear reading or your strippers make a clean cut every time, the job moves faster—and you stay safer. That’s why I’m careful about what I carry in my bag. You should be too.
Multimeter
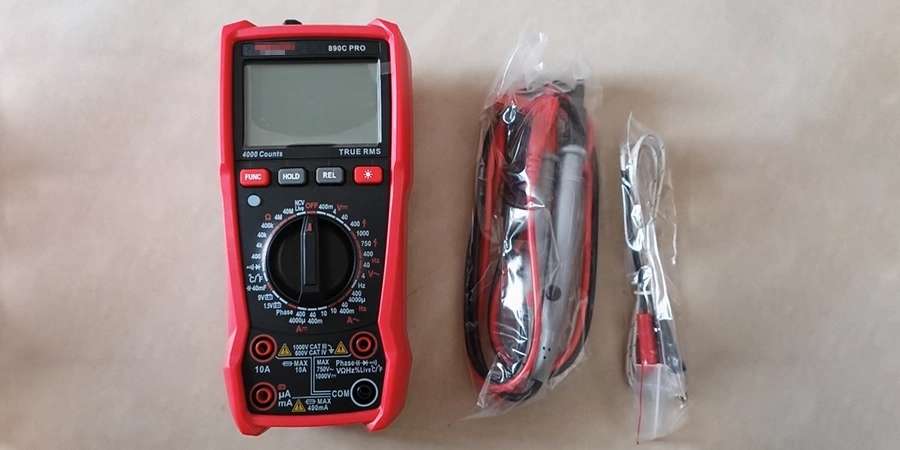
Trying to fix electrical issues without a multimeter is like driving with your eyes closed. This tool helps electricians quickly find problems and make sure circuits are working safely.
A multimeter measures voltage, current, and resistance—essential for diagnosing faults and checking if systems are working right. Features like True RMS and CAT III/IV ratings add accuracy and safety, making the multimeter a must-have for any electrician.
Now that you know why a multimeter is essential, let’s explore its features and how to choose one that fits your needs.
Why Multimeters Matter
The multimeter is often called the “Swiss Army Knife” of electrical tools because it does so much. I’ve seen electricians grab it first to check if a circuit is live, measure component resistance, or verify current draw. Here’s why it’s a must-have:
-
Voltage Measurement: Whether it’s an AC or DC system, checking the voltage helps confirm if things are working properly—or if a voltage drop points to a problem.
-
Current Measurement: Helps make sure devices aren’t drawing too much power, which can prevent overheating, fires, or damage.
-
Resistance Testing: Useful for checking wire continuity, finding shorts, or testing resistors.
Key Features to Look For
Modern multimeters are packed with features that make the job easier and safer:
-
True RMS: Accurate readings with devices like LED lights that don’t draw power evenly.
-
CAT III/IV Ratings: Indicates the tool is safe for higher-voltage work.
-
Auto-Ranging: Automatically selects the measurement scale for you—no manual settings needed.
-
Bluetooth Connectivity: Lets you log and track data for analysis over time.
-
Backlit Display: Easy to read, even in dark spaces.
Real-World Impact
I once saw an electrician use a Fluke multimeter to quickly find a loose wire in a junction box when the lights wouldn’t turn on. Without it, they might spend more time.
Brands like Fluke, Klein Tools, and Ideal offer reliable options—from $50 to $300. In my experience, I’ve learned that a good multimeter doesn’t just save time—it prevents costly mistakes. It’s one of the smartest tools you can have in your kit.
Voltage Testers
In electrical work, mistaking a live wire for a dead one can be deadly. That’s why voltage testers are a must—they help you know exactly what’s energized and what’s safe to touch.
Voltage testers are tools that check for the presence of electrical voltage. There are two main types: non-contact testers, which are great for quick, no-touch checks, and contact testers, which give more precise readings. Both are essential for staying safe on the job, helping electricians confirm whether a wire or circuit is live before working on it.
Understanding the differences between these two tools can save you time and keep you out of harm’s way. Let’s take a closer look at each.
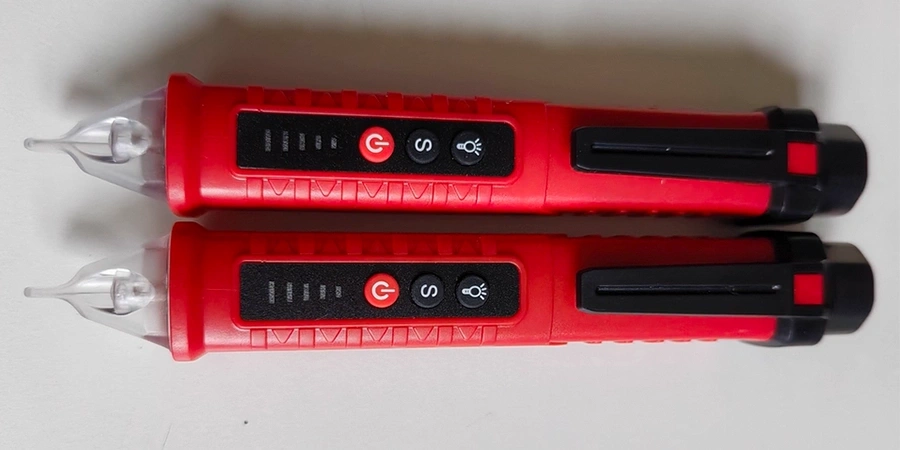
Non-Contact Voltage Testers
Non-contact voltage testers are like a first alert system. They detect voltage by sensing the electromagnetic field around live wires, without any physical contact.
You simply hold the tester near a wire or outlet, and it lights up or beeps if voltage is present. This makes them perfect for quick safety checks before you start working. I’ve seen electricians use these to scan outlets or junction boxes on busy job sites, saving time and reducing risk.
Their compact, pocket-sized design means you can carry one everywhere, and features like adjustable sensitivity help in tricky environments where other electrical equipment might interfere.
Contact Voltage Testers
Contact voltage testers are all about precision. Unlike non-contact testers, these require you to touch the circuit with probes to get an exact voltage reading—crucial when safety depends on certainty.
They’re especially important during tasks like lockout/tagout procedures, where you must be absolutely sure a circuit is off. I often saw electricians use one to confirm a panel was de-energized before starting a major repair. Without that check, there could be risks.
These testers usually offer multiple voltage ranges and have clear indicators, making them a trusted tool for both home and industrial electrical work.
Quick Comparison
Here’s a quick comparison to clarify their roles:
| Feature | Non-Contact Voltage Tester | Contact Voltage Tester |
|---|---|---|
| Detection Method | Electromagnetic field | Direct contact |
| Purpose | Quick safety checks | Precise voltage measurement |
| Key Features | Visual/audible alerts, CAT III | Multiple ranges, CAT III |
| Applications | Outlet testing, circuit verification | Lockout/tagout, commissioning |
| Price Range | $15–$80 | $15–$80 |
Why You Need Both
Both types of voltage testers are affordable, usually priced between $15 and $80. Trusted brands like Fluke offer solid options—like the 1AC II, a popular non-contact tester known for its reliability.
Non-contact testers are great for fast checks, but they can sometimes give false positives—especially around heavy machinery or in areas with electrical noise. That’s why it’s smart to always double-check with a contact tester when safety is critical.
For apprentices, having both in your kit not only builds confidence but also reinforces safe habits from the start. Just remember to check the batteries regularly to keep them working properly.
Used together, these testers make a strong safety combo—quick checks and accurate confirmation in one setup.
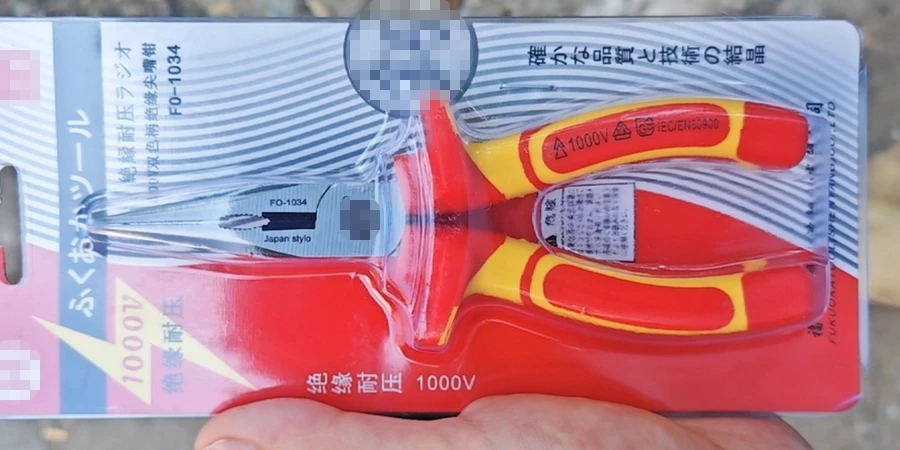
Insulated Pliers
Working around hot wires is risky without the right tools. Insulated pliers give you the grip and control you need—while protecting you from electric shock.
Electricians rely on these pliers to safely handle wires and components in energized environments. The insulated handles block electrical current, making them essential for tasks like twisting wires or cutting inside panels.
Now that we’ve covered why insulated pliers are crucial, let’s explore the types and what to look for when buying them.
Types of Insulated Pliers
Insulated pliers come in several forms, each designed for specific tasks:
-
Linesman Pliers: Strong and versatile—Great for cutting, stripping, and gripping wires.
-
Needle-Nose Pliers: Slim and precise, perfect for tight spaces and small components.
-
Side-Cutting Pliers: Made for clean, accurate cuts without damaging insulation.
Choosing the Right Pair
Here’s what to look for:
-
VDE Certification: This means the pliers are tested for up to 1000V and meet international safety standards.
-
Comfortable Grip: Ergonomic handles reduce hand fatigue—especially important for long jobs.
-
Check for Damage: Inspect the insulation regularly. If you see cracks or wear, replace them right away.
A Real-World Example
In high-risk environments like live panels, insulated pliers can be the difference between a close call and a serious injury. There have been cases where electricians accidentally made contact with live wires—but thanks to properly insulated tools, they walked away unharmed.
Brands like Klein Tools and Knipex, priced from $25 to $120, are trusted for a reason. In electrical work, insulated pliers aren’t optional—they’re a critical layer of protection on every job site.
Fish Tape
Running wires through walls or conduits can be a real challenge. Many laymen spend hours trying to fish cables, risking damaged wires or holes in the wall. That’s where a fish tape comes in—it makes the job faster, cleaner, and way less frustrating.
A fish tape is a flat, flexible metal strip used to guide wires through walls, conduits, or tight spaces. It helps you install wires without damage, making your work safer, neater, and more efficient.

Now that you know what a fish tape does, let’s see how it works and why it’s a game-changer for your toolkit.
How Fish Tape Works
A fish tape is usually made from spring steel or fiberglass. One end has a small hook or loop. You push it through the wall or conduit, attach the wire to the end, then pull it back out. This lets you guide the wire through hard-to-reach areas without damage or hassle.
Types of Fish Tapes
-
Manual fish tapes are the most common. They’re simple, portable, and great for everyday jobs.
-
Motorized fish tapes are used for longer runs or tougher pulls—they save time and effort.
-
Some advanced models even come with built-in lights or small cameras to help you see inside walls or conduits. But for most tasks, a basic manual fish tape does the trick.
Choosing the Right Fish Tape
Pick your fish tape based on the job:
-
Length: 25 ft is enough for small jobs; up to 200 ft may be needed for large installs.
-
Material: Steel is strong and durable; fiberglass is non-conductive and better near live wires.
-
Grip: Look for an insulated handle if you’re working near potential voltage.
Trusted brands like Greenlee and Klein Tools make solid options, typically priced from $20 to $100 depending on features and length.
Maintenance and Safety Tips
-
Store it properly to avoid kinks and bends.
-
Keep it dry to prevent rust.
-
Wear gloves—the edges can be sharp.
-
Inspect it regularly to catch cracks, frays, or other damage early.
A good fish tape, when cared for, will last you through countless jobs.
Wire Strippers
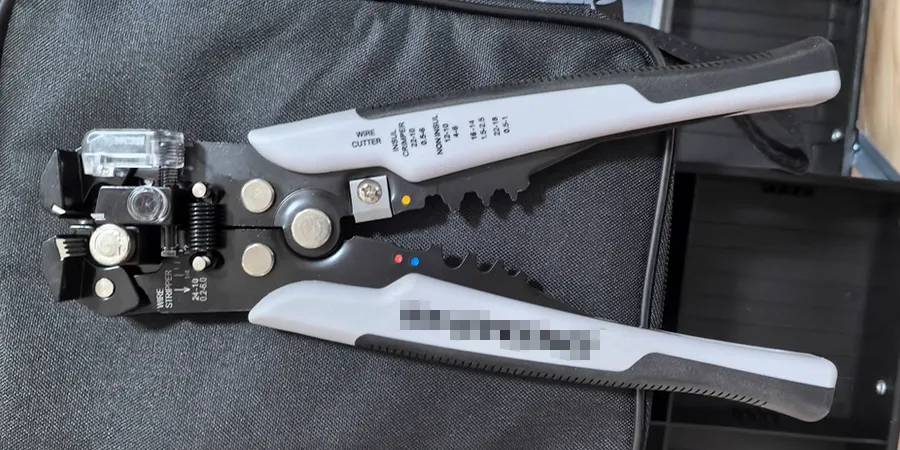
Poor wire preparation can cause faulty connections and safety risks. Wire strippers ensure you remove insulation cleanly without damaging the conductor, ensuring safe and reliable electrical work.
Wire strippers are indispensable because they precisely strip insulation, keeping the wire intact. Automatic strippers can detect wire size, saving time and reducing errors.
Now that you understand why wire strippers matter, let’s see how to choose and use them effectively.
Manual vs. Automatic Strippers
-
Manual Strippers: Affordable and simple, with fixed holes for certain wire sizes. Good for occasional or light use.
-
Automatic Strippers: Adjust to the wire size automatically, speeding up work and minimizing mistakes.
Key Considerations
Pick strippers that match the wire gauges you use most—10-22 AWG is common for residential work; larger gauges for industrial jobs. Look for adjustable strip length for consistent results.
On-the-Job Impact
An electrician I know used automatic strippers on a big panel job, stripping hundreds of wires quickly and accurately. Using manual strippers would have taken much longer.
Automatic models from brands like Klein Tools, priced between $20 and $60, are a smart investment if you strip wires often. Remember to keep them clean for best performance.
Insulated Screwdrivers
Tightening screws inside a electrical panel without the right tools is asking for trouble. I’ve seen electricians narrowly avoid shocks just because they weren’t using insulated screwdrivers. These tools let you work safely—and with confidence.
Insulated screwdrivers are built for electrical work. With VDE certification up to 1000V, they protect you when working around live circuits. They come in different tip styles—like flathead, Phillips, Pozidriv, and Torx—and usually feature ergonomic handles and hardened tips for durability.

Let’s look at why they matter and how to choose the right set.
Why Insulation Matters
Insulated screwdrivers protect your hands from electrical shock. The handles are coated with high-grade insulation, rated for up to 1000V, which prevents current from reaching your hand. That’s critical when working near hot wires or in tight panels where contact is hard to avoid.
Electricians use them for everything—from installing outlet covers to tightening control panel screws. The added safety gives peace of mind, especially in unpredictable conditions.
Types of Insulated Screwdrivers
A complete set should include:
-
Flathead: For standard slotted screws, often found in older systems.
-
Phillips: For cross-head screws, widely used in modern electrical devices.
-
Pozidriv and Torx: For specialized fasteners in industrial equipment.
-
Stubby: For cramped spaces where a full-length screwdriver won’t fit.
Key Features to Look For
When picking a set, consider:
-
VDE Certification: Ensures safety up to 1000V.
-
Ergonomic Handles: More comfort, less fatigue..
-
Hardened Tips: Long-lasting and less likely to strip screws.
Real-World Example
On one job, I watched an electrician upgrading a residential panel while part of the system was still live. He used insulated screwdrivers to finish the job safely. Without that protection, a small slip could have meant injury—or a major delay.
Good insulated sets cost between $30 and $100, and brands like Klein and Wera are known for reliability. Just remember: always inspect the insulation before use. Even a small crack can compromise safety.
For beginners, a quality set of insulated screwdrivers is a smart first step toward working safely and professionally.
Cordless Drill
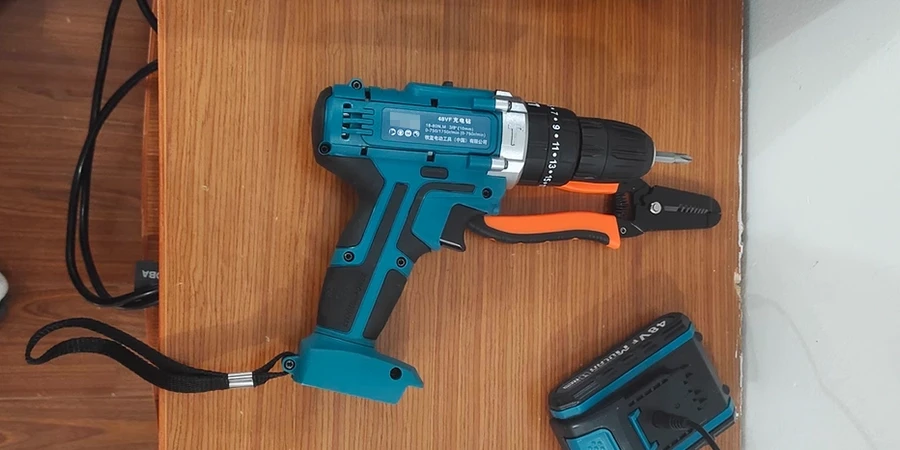
Dragging a corded drill around a job site can be frustrating—especially when power outlets are hard to find. Cordless drills solve that problem, offering freedom of movement and reliable power for drilling and fastening tasks.
Cordless drills are a must-have for electricians. Whether it’s mounting conduit, installing outlet boxes, or doing retrofit work, today’s 18V/20V systems provide professional-grade performance. Many come with brushless motors and LED lights, making them efficient and versatile.
Let’s look at why cordless drills have become standard and what to consider when choosing one.
The Shift to Cordless
Cordless tools are taking over the job site. Industry data shows cordless tools now make up 29% of tool purchases, compared to 20% for corded ones. This shift is driven by the flexibility cordless drills offer—ideal for tight spots like crawlspaces or when working on ladders.
Electricians use them to drill conduit holes, fasten boxes and handle light- to medium-duty fastening tasks without being tied to an outlet.
Must-Have Features
Look for these when you buying:
-
18V/20V Battery: Provides enough power for most electrical tasks.
-
Brushless Motor: Longer runtime, less wear, and lower maintenance.
-
LED Light: Helps in dimly lit areas like basements or ceilings.
-
Variable Speed Control: Makes it easier to drill through different materials like wood, drywall, or metal.
Practical Applications
Cordless drills are especially useful for:
-
Conduit Mounting: Drilling precise holes in walls or studs.
-
Outlet Box Installation: Quickly fastening boxes to various surfaces.
-
Retrofit Work: Working in older homes or commercial buildings without needing nearby outlets.
Priced from $100 to $300, brands like DeWalt and Milwaukee are worth the investment. Keep spare batteries charged to avoid downtime, and store them properly to extend their life. This tool is a lifesaver for any electrician looking to work smarter, not harder.
Pro tip: Keep extra batteries charged and store them properly to avoid downtime and extend their life.
Flashlight or Headlamp
Working in dark spaces is a common challenge for electricians, and poor visibility can lead to mistakes or even injuries. A reliable flashlight or headlamp solves this by providing bright, focused light, ensuring you can work safely and accurately no matter the conditions.
A flashlight or headlamp is essential for electric work because it provides critical illumination in dark or confined spaces, enabling electricians to see wires, connections, and tools clearly. This ensures safe, precise work and prevents errors, making it a vital tool for any electrician.
Now that we know why lighting is so important, let’s explore what makes a good flashlight or headlamp for electrical work.
Types of Lighting Tools
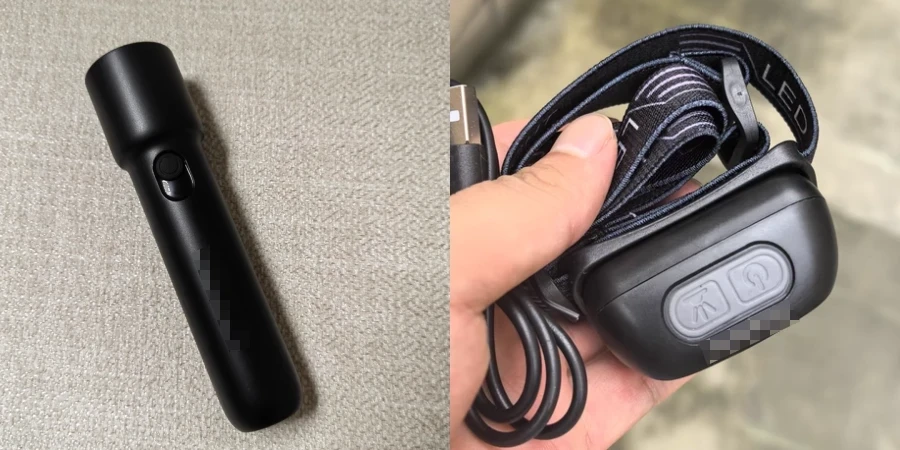
Electricians typically choose between two options: handheld flashlights and headlamps.
-
Flashlights: versatile and allow you to aim light exactly where needed—but they occupy one hand, which can be limiting when using tools.
-
Headlamps: worn on your head, offer hands-free lighting—a major advantage when working in crawl spaces, attics, or overhead areas. Many electricians rely on them because they keep both hands free while maintaining consistent light.
Key Features to Consider
When shopping for a flashlight or headlamp, look out for these features:
-
Brightness (Lumens): Measured in lumens, brightness determines how well you can see. For electrical work, 100-300 lumens is usually enough, but larger spaces may require up to 500 lumens.
-
Battery Life: Long-lasting batteries are crucial for extended jobs. Rechargeable models or those using standard AAA/AA batteries are practical.
-
Durability: Choose a tool with a shock-resistant build or rubberized grip—it’ll survive drops and rough handling on job sites.
-
Water Resistance: A water-resistant rating (like IPX4) protects against moisture, useful in damp environments like basements or outdoor panels.
-
Adjustable Settings (Headlamps): Spot and flood modes let you switch between focused or wide beams depending on the specific task.
Practical Applications
Good lighting tools are useful in many situations, such as:
-
Confined Spaces: Attics, crawl spaces, or basements often lack natural light.
-
Night Work: Outdoor jobs or emergency repairs after dark demand reliable light.
-
Power Outages: When circuits are off, you still need to see to work safely.
Choosing the Right Tool
Brands like Petzl (headlamps) and Maglite (flashlights) are trusted for durability and performance. Basic flashlights start around $10, while high-end, rechargeable models range from $50–$100. Headlamps typically cost $20–$100, depending on features like adjustable beams and brightness levels.
Many electricians carry both: a small flashlight for quick inspections, and a headlamp for hands-free tasks. Just make sure to check your batteries before each job—and always keep spares handy.
Circuit Breaker Finder
Nothing’s more frustrating than flipping breakers one by one to find the right one. A circuit breaker finder takes the guesswork out, identifying the correct breaker in minutes.
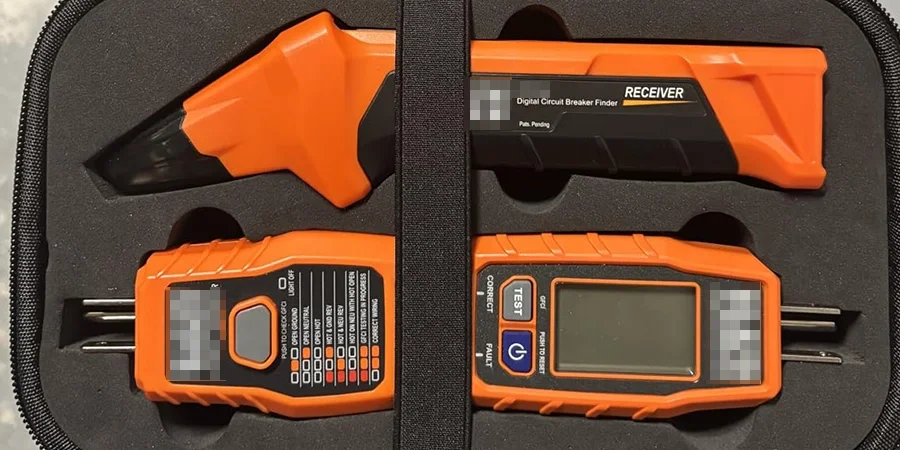
This tool uses a transmitter and receiver system to trace circuits, helping you quickly match an outlet or fixture to its breaker. It’s especially useful on large commercial panels where manual testing can waste time and disrupt operations.
Let’s see how this tool saves time and why it’s a must for complex jobs.
How It Works
A circuit breaker finder has two parts:
-
Transmitter: Plugs into the outlet or connects directly to the circuit.
-
Receiver: Scans the panel and signals when it detects the correct breaker—usually with lights or sound.
This setup helps electricians avoid trial-and-error and reduces the risk of shutting down the wrong system.
Why It’s a Game-Changer
In commercial or multi-unit buildings with 50 or more breakers, manually testing each one is a nightmare. identifying the right one manually can take forever. A breaker finder can cut troubleshooting time by up to 30%, helping jobs stay on schedule and minimizing disruption.
Choosing the Right One
Key features include:
-
Clear Signal Indication: Audible and visual alerts improve accuracy.
-
Multiple Circuit Testing: Ideal for large or complex
-
Rugged Design: Built to withstand job site conditions.
A Real-World Story
On a recent commercial retrofit, a circuit breaker finder helped quickly isolate the breaker controlling a faulty outlet. Without it, testing breakers manually could have delayed the project and impacted the client’s operations.
Priced from $50 to $200, models from trusted brands like Fluke are well worth the investment. For apprentices, this is a great early tool—it builds both speed and confidence when navigating panels.
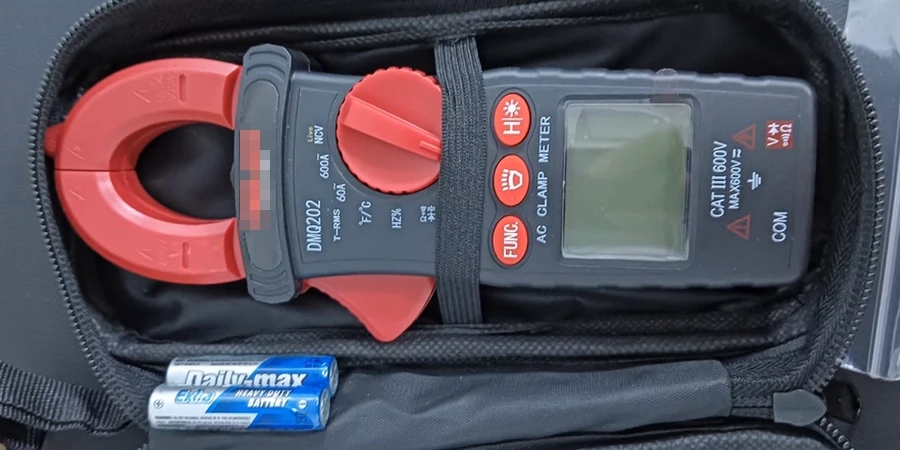
Clamp Meter
Diagnosing electrical issues without the right tools can feel like guesswork. Measuring current safely is one of the biggest challenges. A clamp meter solves this by making current checks fast, accurate, and safe.
A clamp meter measures current without touching bare wires. Just clamp it around a conductor, and it uses the magnetic field to detect current flow—no need to break the circuit. This non-invasive method is perfect for checking live systems without downtime or risk.
Let’s look at how clamp meters work and why they’re critical for diagnostics.
Non-Invasive Measurement
Clamp meters measure current by clamping around a wire, using a magnetic field to detect current flow without breaking the circuit. This is safer and faster than traditional methods requiring direct contact.
Key Features to Look for
When choosing a clamp meter, consider these must-have features:
-
True RMS: Gives accurate readings on non-linear loads like LED drivers or motors.
-
Large Jaw Opening: Makes it easier to clamp around thick wires or bundled cables.
-
Data Logging: Helps you track changes over time, useful for diagnosing intermittent problems.
-
CAT III/IV Ratings: Ensures safety when working in high-voltage environments.
Practical Uses
Clamp meters are ideal for:
-
Motor Analysis: Checking current draw to diagnose motor issues.
-
Load Balancing: Make sure circuits aren’t overloaded.
-
Power Quality Checks: Spot harmonics or irregular loads.
Priced from $100 to $400, brands like Fluke and Ideal are top choices. For professionals, a clamp meter is a diagnostic powerhouse, helping you spot issues quickly and keep systems running smoothly.
Conclusion
The right tools don’t just get the job done—they help you do it safer, faster, and with confidence. Build your kit with care, choose quality over shortcuts, and every job becomes a little smoother.
Whether you’re starting out or sharpening your edge, good tools always pay off.
Great Tools Deserve Great Components
Electricians love working with our breakers because they are built to last and easy to install. Don’t let cheap components waste your skilled labor.