When my lights flickered for the third time in a week, I knew something was off. The same breaker had tripped again—and wouldn’t stay on. It was frustrating, and honestly, a bit alarming. Electrical problems can feel intimidating, but with the right tools and safety steps, replacing a breaker is often something you can handle yourself.
Yes, you can replace a household circuit breaker yourself if you have basic electrical knowledge, the correct tools, and follow strict safety precautions. However, this task carries serious risks—like electric shock or fire—if done incorrectly. For complex panels or uncertain situations, it’s best to hire a licensed electrician.
If you’re thinking about replacing a breaker yourself, it’s not just about saving money—it’s about knowing what you’re doing and doing it safely. Let’s dig into what you really need to know before touching that panel.
Understanding Circuit Breakers and Their Role
Have you ever wondered what stops your home’s electrical system from going wild? Circuit breakers are the quiet heroes that keep things safe. They’ve prevented disasters more times than I can count. But what exactly do they do, and why are they so important?
Circuit breakers protect your home by cutting off the electricity if there’s too much power flowing through the wires or if there’s a short circuit. This helps prevent fires and stops your appliances from getting damaged.
Let’s take a closer look at why circuit breakers matter.
Why Circuit Breakers Matter
Circuit breakers control the electricity running through your home. When too much electricity flows through a circuit—maybe because an appliance is faulty or too many devices are plugged in—they “trip” and shut off the power. This prevents wires from overheating, which could cause fires. I once helped my friend whose breaker kept tripping because of an old space heater. That breaker was the only thing stopping a fire from happening.
There are different kinds of breakers:
-
Standard breakers for everyday circuits
-
GFCI breakers for places with water, like bathrooms
-
AFCI breakers that protect against fires caused by electrical sparks, usually in bedrooms
Each type has a special job, so it’s good to know which one you have. Most breakers last around 30 to 40 years, but if they trip often or get old, they might stop working properly. According to the National Fire Protection Association (NFPA), electrical problems cause thousands of house fires every year. That’s why keeping your breakers in good shape is so important. Regular check-ups can catch problems early and keep you safe.
Signs Your Circuit Breaker Needs Replacement
How can you tell when a breaker is failing? Sometimes warning signs are ignored by people, which often lead to bigger problems down the road. Catching these issues early can prevent serious trouble. Let’s look closer at what to watch for.
-
Frequent tripping: If your breaker shuts off during normal use, it might be worn out or there could be a deeper wiring problem.
-
Failure to reset: A breaker that won’t stay reset—turning off immediately after being switched on—is likely faulty.
-
Physical damage: Scorch marks or rust are serious warning signs that indicate potential fire risk.
-
Burning smell or heat: If the breaker smells like burning or feels hot, treat it as an emergency. Turn off the main power and call a professional immediately.
-
Buzzing sounds: Often caused by loose connections or sparking inside the breaker, which are dangerous.
-
Age: Breakers older than 25–30 years may not handle today’s electrical demands well, especially in older homes with 60-amp panels.
According to the Electrical Safety Foundation International (ESFI), 51% of electrical fires come from wiring and related equipment, so it’s important not to ignore these signs.
What to Know Before Replacing a Circuit Breaker
Electricity is not something to take lightly. Many accidents happen because people skip important safety steps. So, what should you do to stay safe?
Always turn off the main power, wear insulated gloves and shoes, use a voltage tester to make sure there’s no power, check local codes, and never touch hot utility lines.

Safety is the top priority when working with electricity. Here’s how to protect yourself.
Staying Safe Around Electricity
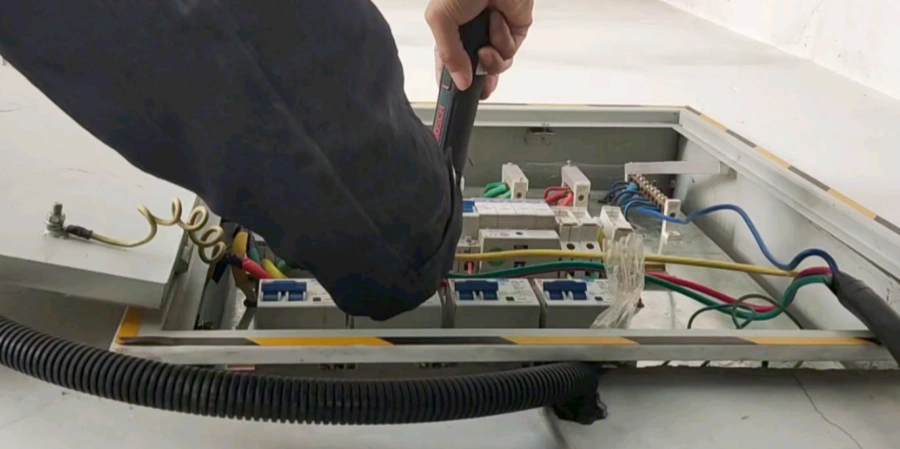
Before opening the breaker panel, switch off the main breaker to cut power to the entire house. Then, use a non-contact voltage tester to confirm the circuits are dead. Even professionals sometimes get shocked when they skip this step, so never trust a switch without testing.
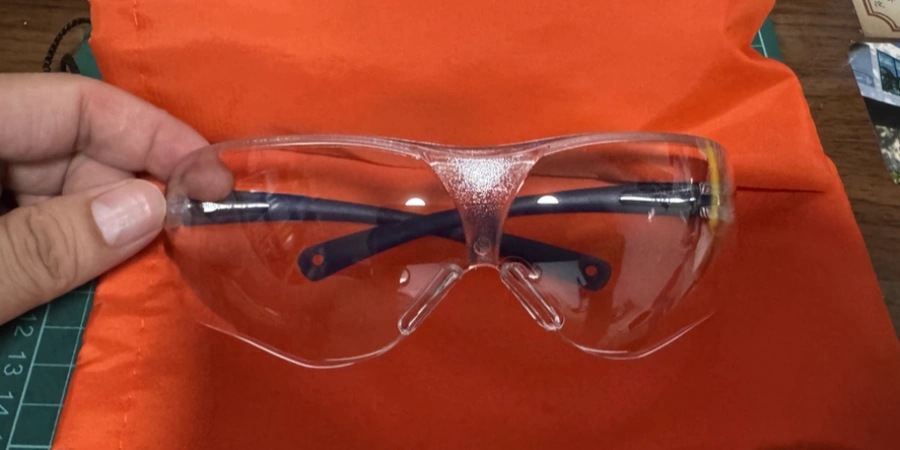
Wear insulated gloves and rubber-soled shoes to reduce the risk of electric shock. Safety glasses are also important to protect against sparks or debris. Make sure to check local building codes, as some places require permits or a licensed electrician for this kind of work.
Remember, even with the main power off, the utility lines feeding your panel are still live—You should stay away from them.
You might wonder, can you replace a breaker without turning off the main power? Absolutely not. It’s extremely dangerous and can lead to serious injury. According to the Occupational Safety and Health Administration (OSHA), around 4,000 electrical injuries happen each year, many because people skip basic safety precautions. Always test first, protect yourself, and know your limites before starting.
How to Replace a Circuit Breaker?
Replacing a circuit breaker is a manageable task—as long as it’s done carefully and safely. Here’s a clear, step-by-step guide to walk through the process. Follow these steps closely to help keep your electrical system safe and functioning properly.
Step-by-Step Instructions
-
Turn off the main breaker to shut off power to the entire panel.
-
Confirm with a voltage tester that the panel is de-energized before proceeding.
-
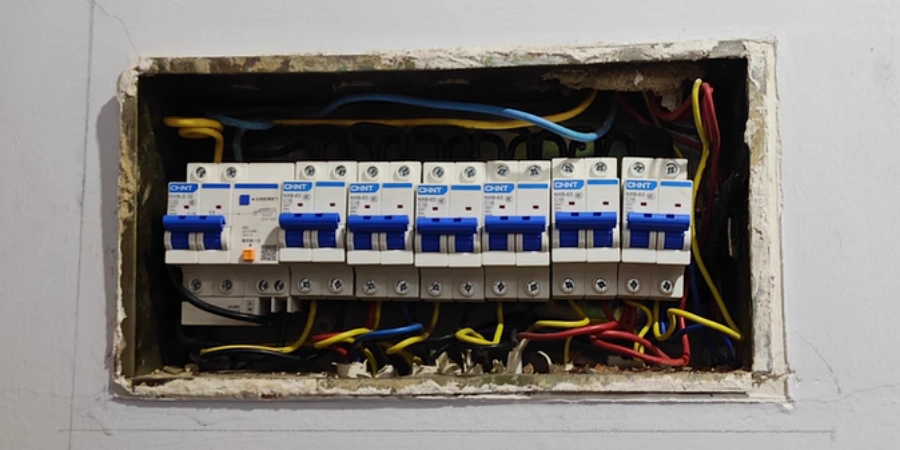
Remove the panel cover using an insulated screwdriver.
-
Locate the faulty breaker—it may be tripped, burned, or visibly damaged.
-
Disconnect the wires:
-
Loosen the terminal screw to remove the hot (black) wire.
-
For GFCI or AFCI breakers, also remove the neutral wire and pigtail.
-
-
Remove the old breaker by gently pulling it from its slot.
-
Install the new breaker, making sure it matches the old one in brand, type, and amperage.
-
Reconnect the wires and tighten the terminal screws securely.
-
Reattach the panel cover.
-
Turn the main power back on, then switch the new breaker to the "on" position.
-
Test the circuit with a light or appliance to confirm it’s working.
Bear in mind that you should NOT replace a 15-amp breaker with a 20-amp unless the wiring is rated for it (12-gauge or thicker). Using a 20-amp breaker on 14-gauge wire can cause overheating and fires.
For contractors and distributors, ensuring a steady supply of high-performance breakers is key to maintaining safety standards across multiple projects.
Cost Breakdown
| Task | DIY Cost | Professional Cost |
|---|---|---|
| Circuit Breaker (15–20 amp) | $5–$15 | $5–$15 (parts only) |
| Labor | $0 | $100–$200 |
| Tools (if not already owned) | $20–$50 | Included in labor cost |
A safe, successful install depends on taking your time—especially with wiring. Mistakes usually happen when people rush.
When to Call a Professional Electrician?
Some electrical tasks are better left to the experts. Knowing your limits can prevent costly mistakes and serious safety risks.
Call a licensed electrician if you’re dealing with:
-
A complex or outdated panel (e.g. Federal Pacific or Zinsco)
-
Breakers that still trip after replacement
-
Little to no experience with electrical work
-
Main breaker replacement
-
Local code or permit requirements
Let’s explore why some situations are best left to the experts.
Why It’s Sometimes Best to Hire a Pro?
Older electrical panels—like those made by Federal Pacific or Zinsco—can be unsafe and complicated to service. Licensed electricians know how to handle them safely.
If a newly installed breaker keeps tripping, it may point to deeper issues, such as faulty wiring or an overloaded circuit. These require expert diagnosis.
Inexperienced with electrical work? The risks of shock, fire, or damaging your home often outweigh the cost savings of DIY.
Replacing a main breaker is not a typical DIY task—it may involve working near live utility lines or coordinating with the power company, which only professionals are licensed to do.
In many areas, local codes require permits, inspections, or licensed installation for certain types of work. Always check with your local building department.
While a DIY breaker replacement might cost $5–$15 for parts, hiring a pro typically costs $100–$200 according to Angi. But when safety’s on the line, it’s often worth every penny.
Tools and Materials Needed for Replacement
Are you planning to replace a circuit breaker? Having the right tools is essential for doing the job safely and correctly.
You’ll need: an insulated screwdriver, non-contact voltage tester or multimeter, insulated gloves, safety glasses, a matching replacement breaker, electrical tape, a marker, and a flashlight.
Essential Tools for the Job
-
Insulated screwdriver: For removing the panel cover and loosening or tightening terminal screws.
-
Voltage tester or multimeter: Confirms that the power is completely off—an essential safety step.
-
Insulated gloves: Help prevent electrical shock while working near wiring.
-
Safety glasses: Protect your eyes from sparks or falling debris inside the panel.
-
Replacement breaker: Must match the panel’s brand, type, and amperage. Using the wrong one can be a fire hazard (The Spruce).
-
Electrical tape and marker: Useful for labeling wires and keeping track of connections.
-
Flashlight: Helps illuminate the work area, especially in dark or cramped panels.
Tip: It’s a good idea to have someone nearby in case of emergency, especially when working with electrical panels.
Conclusion
Replacing a circuit breaker yourself is possible with the right know-how and tools, but it’s not a one-size-fits-all task. From understanding breakers to spotting issues and staying safe, being informed is key. If you’re unsure or face complex problems, a professional is worth the call. Electricity demands respect—prioritize safety, and you’ll keep your home powered and protected.
For electrical distributors and contractors seeking consistent quality for their inventory, please explore Sincede’s Low Voltage Circuit Breaker Solutions to see how we can support your business with reliable finished and SKD products.