I still remember the first time someone stood in front of the sample cabinet and pointed to a small red button on a breaker panel, asking what it did. I had only been working at the manufacturer for about a month, and I could only give a vague answer about testing. The button was small and ordinary, but its red color stood out against the gray panel and caught my eye.
After that, I kept noticing the button whenever I was around the breakers. Sometimes I would pick up an MCCB and press it lightly, just to feel how it worked. That little red button seemed simple, yet it always drew my attention.
Over time, I realized how easy it is to overlook small details in a complex system. Things that seem minor can quietly keep everything running smoothly. That tiny red button had its own story—and I was only just starting to understand it.
What Is the Trip Button on an MCCB for?
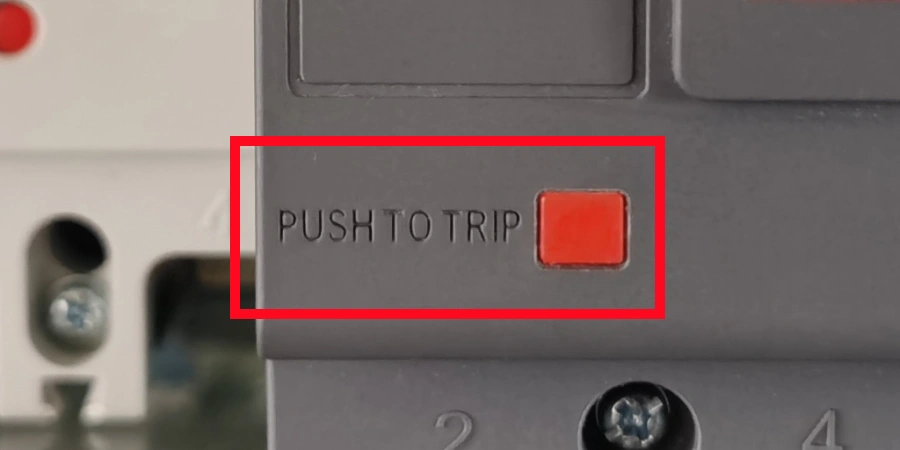
The trip button, often called the push-to-trip button, is a small button found on the front panel of many MCCBs. Its sole purpose is to manually start a trip during testing or maintenance. It is not meant for everyday switching. You can think of it as a built-in diagnostic tool — a way to check whether the breaker can do its job before you ever need it to.
What It Looks Like and Where to Find It?
The button is usually small and slightly recessed into the front panel. It is commonly colored red or black so it stands out from other components, although the exact color can vary depending on the manufacturer. On most units, it sits near or below the main operating handle. You will typically find it labeled "TEST," "TRIP," or marked with a small symbol, depending on the supplier.

Not every MCCB include this feature. Some manufacturers provide it as a standard function; while others offer it only on certain product lines. For example, certain Mitsubishi WS-V series variants do not come with a trip button at all. Because of this, it is always a good idea to check the product datasheet or manual before assuming the button is present.
Why It Exists?
The main purpose of this feature exists is verification. When a breaker is installed — whether it’s brand new from the factory or has been sitting in a panel for years — there needs to be a way for us to confirm that the internal trip mechanism still works correctly. The trip button provides exactly that. It lets a technician confirm the breaker will open when it is supposed to, without having to create an actual fault condition on the circuit.
This is especially useful when the MCCB has auxiliary devices attached to it, such as alarm switches or shunt trip coils. When these accessories are present, it becomes even more important to verify that the whole system responds correctly when a trip occurs. The trip button offers you a controlled way to test that chain of events.
In short, it is a small feature with a clear and practical function: make sure the breaker works before you actually need it to.
How the Trip Button Works?
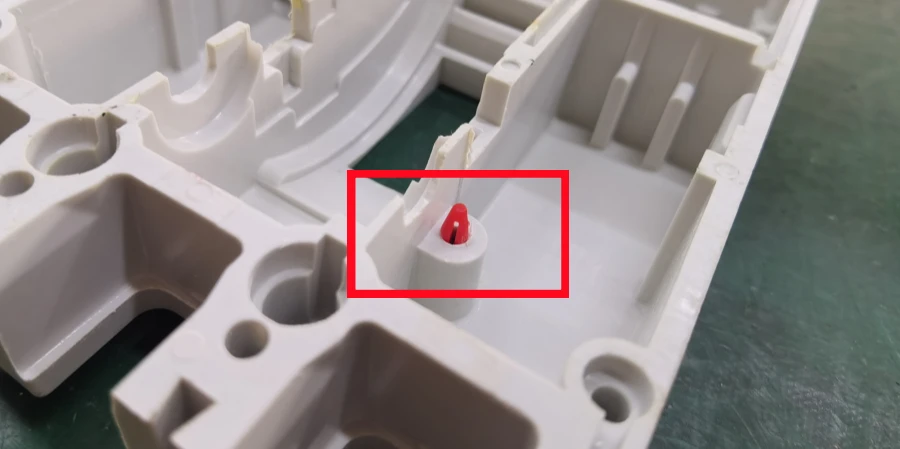
Pressing the trip button while the MCCB is energized directly activates the internal trip bar inside the breaker. This is a mechanical latch that, when released, allows the contact assembly to spring open and interrupt the circuit. Importantly, this happens regardless of what the actual circuit current is doing at the time.
The trip unit — whether thermal, magnetic, or electronic — is not involved in this action at all. You are essentially bypassing the sensing mechanism and going straight to the mechanical action.
The Mechanical Path Inside the Breaker
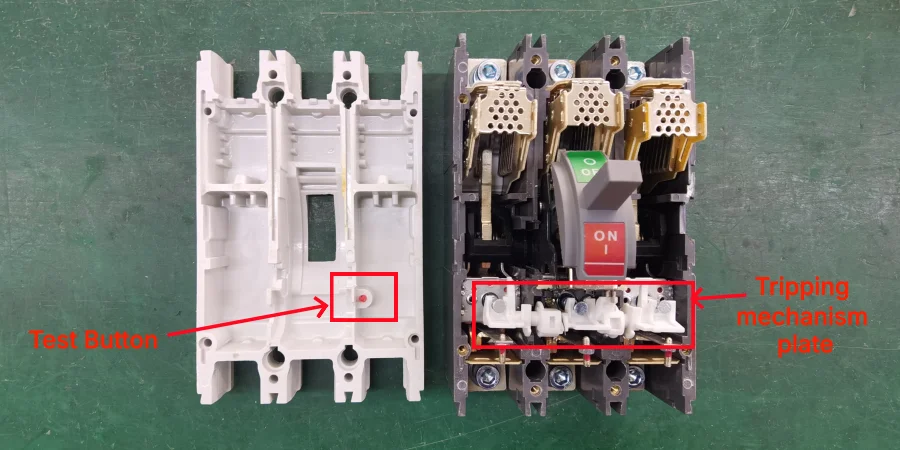
To understand why this matters, it helps to know a little about how a breaker opens under normal fault conditions. In a real fault situation, the trip unit detects an abnormal condition, such as excess current or a short circuit, etc. It then sends a signal — either thermal or electromagnetic — to release the trip bar. Once released, the stored spring energy inside the breaker mechanism forces the contacts apart and interrupts the circuit.
When you press the trip button, you skip the detection step completely. The button pushes a small rod or lever that directly releases the trip bar. As we said before, this allows technicians to confirm that the mechanical linkage between the trip bar, contact assembly, and operating handle works correctly — without creating a real fault on the line.
What the Test Tells You?
This is where the practical value becomes clear. The trip button does NOT test whether the trip unit detects faults correctly — that type of verfication requires a separate testing equipment, such as current injection systems.
What the trip button does test is the mechanical reliability of the breaker itself:
-
Can the trip bar release freely?
-
Do the contacts open fully and cleanly?
-
Does the handle move to the tripped (middle) position as expected?
-
Do any connected auxiliary devices (like alarm switches) respond correctly?
| What the Trip Button Tests | What It Does NOT Test |
|---|---|
| Mechanical release of the trip bar | Trip unit fault detection accuracy |
| Contact opening and separation | Overload sensing calibration |
| Handle movement to tripped position | Short-circuit response threshold |
| Auxiliary device response (alarms, signals) | Insulation resistance of conductors |
We could learn from the table that the trip button is one part of a complete maintenance routine — not a replacement for full electrical testing.
After the Button Is Pressed
Once the breaker trips, the handle moves to a middle position — not fully OFF, not fully ON. This is the standard "tripped" position that most MCCBs use to indicate that the trip happened internally rather than being manually switched off.
To reset the breaker, you first move the handle fully to OFF first, then switch it back to ON. This resets the mechanical latch and prepares the breaker for normal operation again.
If the breaker trips again immediately after you reset it, that usually indicates a real fault in the circuit rather than a problem with the trip button. In that case, the circuit should be inspected before the breaker is re-energized.
Understanding this sequence — press, trip, reset — is key to using the trip button correctly. It is a simple process, but knowing what each step confirms makes it a much more useful part of your maintenance routine.
How to Use the Trip Button?
The first time I did a formal trip button test with a customer’s maintenance team, I noticed that everyone had slightly different ways of doing it. Some preferred to press the button while the system was live, while others checked the handle position first. It made me realize that even a simple test can be done differently if there isn’t a clear, consistent process.
Using the trip button correctly is not complicated, but there is a specific sequence to follow — skipping steps, especially safety ones, can create unnecessary risk.
Step 1: De-Energize and Apply Lockout/Tagout (LOTO)
Before doing anything, ensure the system is de-energized. This means isolating the upstream supply and following your site’s Lockout/Tagout (LOTO) procedure. LOTO is not optional — it is the standard safety control that prevents the circuit from being accidentally re-energized while someone is working on it.
Once LOTO is applied, use a calibrated voltage tester to confirm that all terminals — line and load side — read zero voltage. Do not rely on indicator lights alone; always verify with your meter.
Step 2: Inspect the Breaker
Before energizing, take a moment to look at the breaker. Look for any visible signs of damage, discoloration, or debris around the trip button and handle mechanism. If the breaker hasn’t been tested for a long time, noting its condition now is helpful for future maintenance.
Step 3: Re-Energize and Set the Handle to ON
Remove LOTO and restore power. Move the breaker handle to the ON position. The circuit should now be live. The trip button test must be performed with the breaker energized to be meaningful.
Step 4: Press the Trip Button
Press the trip button firmly. The breaker should respond immediately — the handle moves to the middle "tripped" position and the circuit opens. This response should be instantaneous. Any hesitation or partial movement suggests a mechanical issue that needs further investigation.
If connected auxiliary devices like alarm switches, indicator lights are connected, check that they respond correctly during the trip.
Step 5: Reset the Breaker
To reset, move the handle fully to the OFF position first. This is a required step — it re-engages the internal latch. Then move the handle back to ON to restore the circuit.
If the Breaker Re-Trips After Reset
If the breaker trips again as soon as you move the handle to ON, stop. This is not a trip button problem — it means there is a live fault on the circuit. The breaker is doing its job. Investigate the connected load, check for loose wiring, and inspect insulation before attempting to energize again.
How Often Should You Run This Test?
NEMA AB4 guidelines recommend testing MCCB trip functions at least annually as part of a regular maintenance schedule. In higher-demand or critical applications — data centers, industrial machinery, emergency systems — more frequent testing may be needed. If a breaker has recently cleared a high-fault event, it should be tested and potentially replaced before being returned to service, since the mechanism may have experienced stress.
The trip button test is quick, usually taking only a few minutes, but it provides real confidence that your protection system will respond when it matters most.
Conclusion
Even small features like the trip button can make a big difference. It’s a quick, hands-on way to see that the breaker is ready when it’s needed most. Regular checks build confidence in your electrical system and help avoid costly downtime or hazards.